Bootee Door Knob Covers – You might even choose various varieties of coordinating glass knobs to get an eclectic appearance! Knobs are available in
Continue Reading →
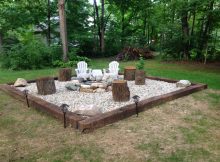
30 Best Backyard Fire Pit Area Inspirations For Your Cozy And Rustic within sizing 3166 X 2375 Small Backyard Fire Pit Designs – Whether
Continue Reading →
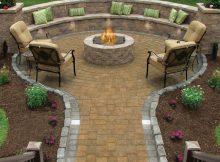
17 Of The Most Amazing Seating Area Around The Fire Pit Ever for sizing 1000 X 1334 Garden Fire Pit Ideas – Patio fire
Continue Reading →
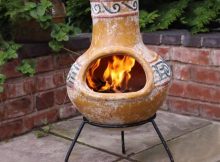
Owning A Clay Chiminea Backyard Fire Pit for dimensions 1000 X 1000 Chiminea Fire Pit Clay – Outdoor fire pits are quickly becoming the
Continue Reading →
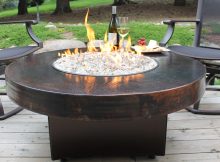
Copper Fire Pit Table Hammered Copper Fire Pit Table within measurements 2916 X 2083 Hammered Copper Fire Pit Table – Whether fire is our
Continue Reading →
Small Backyard Fire Pit Designs 9 Best Outdoor Patio Ideas With inside dimensions 2592 X 1944 Best Fire Pit Design – Determining the selection
Continue Reading →
Backyard Fire Pits That Heat Up Your Landscape pertaining to dimensions 1083 X 844 Backyard Gas Fire Pit Ideas – The fire pits popularity
Continue Reading →
Outdoor Fire Pit Extra Large Bronze Fire Pit Steel Backyard With in dimensions 1000 X 1000 Large Portable Fire Pit – An outdoor fire
Continue Reading →
Cowboy Cauldron Makes The Worlds Finest Fire Pits Period pertaining to sizing 1440 X 900 Cowboy Kettle Fire Pit – Garden fire pits extend
Continue Reading →
6 12 18 24 30 36 Stainless Steel Fire Pit Burner Ring Kit For pertaining to sizing 1000 X 968 Natural Gas Fire Pit
Continue Reading →